Pages

Tuesday, October 11, 2011

Have You Heard of My Memories? (And a GIVEAWAY!)

I started scrapbooking when Richard and I began dating about 15 years ago. This was when Creative Memories was just beginning hit the national market for paper-based scrapbooks. I have about 10 different albums since then. I love them, but I admit, taking out ALL of the supplies to start work on an album is so time-consuming. I don't really have the time to complete large-scale albums right now.

Since then,  I have dabbled in a little digital scrapbooking. I've made several albums from different photo-printing sites. The ease of "point and click" is so much better than traditional books. I can stop and start much easier AND take my work with me on my computer.

My Memories is a digital scrapbooking company that allows users complete freedom to personalize their scrapbooks. The software only takes a few minutes and includes access to simply patterned papers to get started on your scrap-booking journey.

When you begin an album on My Memories, you have the option to create pages as you go or to create an album. It works very much like a MS Word document. You can rearrange photos or delete. You can change font size and color. The trick for MAC users is to make sure that your photos are out of iPhoto and saved in a folder on your desktop as jpeg's.

Wanna see what I started tonight?


Cool huh? My Memories has given me this code to help you get started. Here's what you do:

  1. Go to www.mymemories.com 
  2. Purchase the My Memories software and enter this code: STMMMS5430
for your $10 discount off the purchase of the My Memories Suite Scrapbook software and a $10   coupon for the MyMemories.com store ($20 value)

Wanna win a FREE copy of the My Memories Software?

Here's what you do:

Sunday, September 25, 2011

Inspiration and a Giveaway

So, have you found the awesomeness that is Pinterest? It is a place for you to categorize, or "pin" all of the great ideas you find online. Instead of a million bookmarks saved to your computer, you create visual bulletin boards of pictures. What's great is that you can categorize into several bulletin boards. Well, I was looking at Pinterest when I found this:

Saturday, September 17, 2011

Repurposed Earrings to Bold Rings

These rings are so fun to make! To me it's an instant gratification project because you just glue and go. I find my vintage earrings and buttons from estate sales and garage sales. Look for those button earrings from the 60's and 70's. Fancy brooches work well also.

To make these rings, you'll need:


  • a vintage earring 
  • ring blank 
  • jewelry glue
  • pliers

First, use your pliers to remove the earring back or pin. It's ok if you have a little residue left over. If you are little worried, just use a lightweight sandpaper to scrub that off.

Then, apply glue to the middle of the wrong side of the earring. Add ring blank and press. Let it dry overnight so that the glue has time to adhere. 

Admire your new creation! 

Here are some more that I have made:


Sunday, September 11, 2011

Turning Clothes into Quilts?


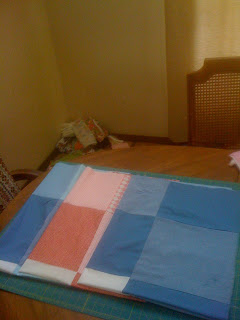
Lately, I've been working on memory quilts. Memory quilts are handmade quilts made a special someone's clothes. My most favorite, of course, use baby clothes. I've made simply designed quilts with a border around all the 5" clothes squares.

Bethany from Vermillion Rules posted another idea for these kinds of quilts.  You follow the baby clothes squares with a border of solid flannel squares, like this:


I've also heard of moms taking bibs or burp clothes and adding that to the fabric mix. Either way, you are cutting some of the clutter in your house, but still keeping some of those favorite outfits from your sweet one. 

The same idea can be applied to special t-shirts. Maybe you know someone who is in sports who has accumulated TONS of shirts that he can't get rid of.  Turn them into a awesome quilt:


I can help you turn those upcycle those shirts into something useful! Email me for more details!


Sunday, August 28, 2011

Sew Crafty Summer


So summer has come and gone in Oklahoma. We start school WAY before Labor Day, so gone are the carefree days of pools and endless sewing. I look forward to Fall - cooler temperatures bring many opportunities to layer and accessorize.
Here are some things I'm making to get ready for Autumn....

Chunky Rings - tutorial coming soon....These are SO easy to make. All you need are buttons, vintage clip earrings, anything that's flat, glue, and a ring blank...

Big, fat, squishy scarves: large knit or crochet scarves are going to be awesome this year....
Knitted cuffs: I found this pattern on Knitty. What a great way to use up extra sock yarn!

T-shirt infinity scarves: This is SO, SO easy. No sewing involved. If you can cut, and tie knots, you can make this!
Baby Blankets: These are also very simple to create. Just cut strips, sew together and add a back. Tutorial coming very soon because everyone needs a quick baby shower gift!

What have you been creating this summer? Please share below -


Wednesday, July 6, 2011

Are You Hooking?


I have a love/hate relationship with crochet. My sister Jill taught me a couple of years ago. After a million tries to just single crochet, I figured it out. Her words?

"Don't quit your day job, Sarah. I think knitting is your thing."

Flash forward and I think I have the basics - single crochet, double crochet, yarn over. But give me a pattern? Puhleeze. I'm ripping back at least 5 times. I think that crocheters, or hookers as they like to be called, have an crazy ability to "see" their pattern. As a knitter, I really rely on the pattern directions to the letter. When you crochet you have to "see" where you are going as you are going there.

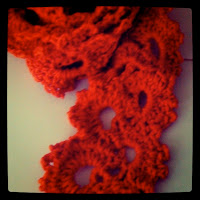
So here is my latest crochet obsession: Queen Anne's Lace. It's a free pattern on K2togonline. The yarn is a silk/cotton blend Debbie Bliss Stella in this really awesome orange, only 2 skeins.
Hmm, i thought, what else do I have in my stash that would make an excellent scarf? What about a webby black Rowan cotton?

Very dramatic, don't you think?


Monday, July 4, 2011

Crafty Mondays


I'm not the only crafty one in my circle of friends. Many of my teacher friends have a hobby they enjoy: digital scrap-booking, beading, knitting, or crochet. This summer my friends and I started gathering for Crafty Mondays.

What do we do? Well, we all work on our latest project together and discuss new ones over light snacks.

What's cool is that each one of us is working on something different, but we are all artists: making something from raw materials with our hands. We "ooh" and "ahh" over each other's projects. And laugh over silly stories.

I'm so thankful I have a group of people I work with that I enjoy hanging with outside of my profession.

Sunday, July 3, 2011

Slubby Scarf - a Recipe


Three words: It is HOT!

But that's not preventing me from doing a little knitting with my handspun. Teal gave me the batting 2 years ago after she went to the amazing Southeastern Animal and Fiber Fair. Drop-spindle spinning takes a long time. A very long time, but it's so worth it.

This pattern is a recipe, which means that it's a simple idea, but can be easily adapted based on yarn yardage, personal tastes, etc.

You will need:
approximately 6 oz handspun.
Size 15 needles

My scarf measured about 5.5" X 72"

Recipe:
1. Cast on 14 stitches with handspun. Knit 6 rows.
2. . *K1, YO to end.
3. Knit, dropping all YO as you go.
4. Knit one row.

**Repeat from * twice more. You should have 3 dropped stitch sections.

Then knit 4 rows garter stitch with your Spud & Chloe Outer. Cut your ends, pick up the handspun and repeat.

I ended mine with 6 rows of Spud and Chloe Outer, largely because I was running out of yarn. Also, I chose not to weave in my ends too much. I think it adds to the charm.

Now, if it would just get a little cooler.....

Thursday, June 30, 2011

Summer Craftiness


It's well into summer here in Oklahoma; it's so hot Ava said this to me when we went to get Vincent from camp:

"Momma, it's so hot my brain hurts! Pick me up!"

Summer gives a me a chance to MAKE all the fun accessories I think of during the school year AND find on twitter and facebook. Here are some things I've made:

kindle cover out of up-cycled jeans

FAVORITE ballband dishcloths
princess-size purse
handspinning with Dawning Dreams batting
market Bag in dishcloth cotton
zig-zaggy wristlet
Bustle Backpack
Ruffly Tote from up-cycled jeans
Vincent's Americana Quilt

All of this, plus some more coming! Come back Monday for a Crafty Monday post!


Friday, March 4, 2011

Join the Hat Brigade!


I've been knitting hats again. Recently, someone shared with me that a dear family member had been recently diagnosed with cancer. I can only imagine what they are going through. I observed from afar my mother's diagnosis and treatment of stage 3 breast cancer. It is a horrible disease and there is so much suffering from it. I firmly believe that we are here on this earth to help ease pain and suffering in all people.

So join me.

Join the hat brigade. If you sew or knit, make someone a hat. If you are lucky and you don't know someone with cancer, make a hat for someone and take it to the hospital. I'm sure that the volunteer league could find a recipient.

Here is the hat I recently made for a special someone:


It's called Felicity. It's a slouchy, stretchy hat made with Berrocco Comfort. The yarn is an acrylic blend that is super soft.

HeadHuggers is an organization that helps provide hats for women recently diagnosed with cancer. There are groups from all over the U.S. and internationally.

If you know someone who has cancer or has been recently diagnosed, please find out how you can help them. I've found out that some people just need someone to listen. Or help with dinner. Or just be there.


Monday, February 7, 2011

Valentine's Day Card-making 2011

While at home for yet another snow day, Vincent, Ava and I made owl valentines this morning. We found the idea from FamilyFun, a great website for parents and teachers.

First use the template to cut out a teardrop shape and then fold at the top, making a triangle.
Then cut out 2 eyes. Vincent was tired of cutting teardrops, so we opted for the paper punch.
You're ready to glue! Print out your saying, get your eyes ready and glue all of your owl's details.
Finally, use up all of that glitter glue (that you have in the depths of your craft closet) and add colorful eyes to your owl!
When we finally thaw out, we'll cut little holes in the bottom for some twizzlers, lollipops or smarties.

This project was a little labor intensive. It took about 2 hours to make 30 valentines. It gave both kiddos some more experience with making art. I asked Vincent if he gets to cut anymore at school and he said, "only on occasion, in art class." Hmm, I see more art projects in his future....

I enjoyed the time AWAY from the chatter of the television and video games. Seriously, if we don't go to school soon, I'm going to start homeschooling....

Sunday, February 6, 2011

Snowpocalypse 2011: What I Sewed


Last week, I taught school for 1 day. Yes, 1 day. Then we had a record-shattering snowfall here Tulsa.

14 inches of snow.

That is enough snow to shut a Tulsa down for a while. So, with the 4 snow days that followed (and there is still question as to IF school will resume Monday) I sewed. And sewed and sewed.

So first, I made 3 baby quilt tops. Using Aimee Ray's pattern, I made 2 blue and 1 pink quilt top.
My plan is to embroider them with the nursery theme. I'm planning presents for 4 babies this spring.

Also, I embroidered the onesies that have been sitting in my craft closet with more art inspired by Aimee Ray.
I have both of her books. I love how she has simple projects and simple motifs that are so pretty when stitched. Also, you can combine several designs to make a picture for a quilt, blanket, etc. Here's the link to her stitch along that just finished up last week.

Next up is a zippered wristlet. Last year, I learned how to sew a simple zippered pouch. The wristlet is just a handle attached - I found several tutorials and then took some of the design elements from them to create my own. Here's the tutorials:

They have 2 little pockets on the inside for cards, keys or a phone.
I made progress on another baby blanket for one of those spring babies:
The pattern is Open Work Baby Blanket by Trudi Brown. It is an easy, 3 row pattern repeat. Of course, I'll be working on this tonight while watching the Super Bowl.

And guess what? School just called and there's no school tomorrow!

Tuesday, January 25, 2011

Do you YUDU?


Wow - I have an amazing, 9 year old boy now. Every year, I enjoy planning my kiddos' party. We've done Blues Clues, Shrek, Music/Drumming, Indiana Jones...So, what kind of birthday party does a 9 year old have?

A gaming party, of course!

And, what kind of party favors are appropriate for a bunch of 9 year olds?

Their very own PARTY SHIRT!

For Christmas, I received a YUDU - a home screen-printing machine. I'm thinking that I could use it to screen fabric for embroidery or to print some scroll-y doodles that I make. Auntie Teal created the invitation and the design for the shirt:

Here is the my first try at home screen-printing:
There is a little bit of a learning curve, but once I figured out how the emulsifying sheets worked, this really is a great little machine!

The shirts were a hit with the boys! The party was awesome - five 9 year olds running around, playing video games and then discovering that it was fun to play outside too.

And there was a little surprise bbgun gift from Aunt Jill:
Aunt Jill, you know I had to razz you a little bit. Still hearing "You'll shoot your eye out, kid!"


Sunday, January 23, 2011

Finished Object: Rosey Little Bee Quilt

About a year ago, I signed up for my first online quilting bee: Rosey Little Bee. I've read books about women getting together (long ago) and working on a quilt. Well, quilting has changed a little since then. Now, with internet, women from all over the world can share their quilting hobby by way of a virtual bee. It works like this:

12-ish people agree to create blocks for one another. Each quilter is assigned a month for the year. For example, I was assigned September, so I sent out my fabric and block pattern to the 11 other girls in August.

After much sewing and cutting and thinking and thinking some more, I decided on this block:
The idea is by the end of your month, your fellow bees have made your block for you and when you get everyone's blocks sewn together, you have this:

I got a little excited about the blocks, and so I made one quilt with the blocks that were sent to me so far. I'm going to make another quilt with the other blocks.

What I liked about joining this group is that I learned to use different colors and to sew different blocks. I enjoyed this so much that I've joined another bee through flickr: 3 X 6 Bee. In this bee, you are joined with 6 other people, but this time, you make the same block 6 times, but in different colors. So at the end of the quarter, you receive 6 different blocks, but in coordinating colors. If you participate all year (optional), you will have 24 blocks to make a large quilt.